How to Send a Calendar Invite in Outlook + How to Follow Up


Casey O'Connor
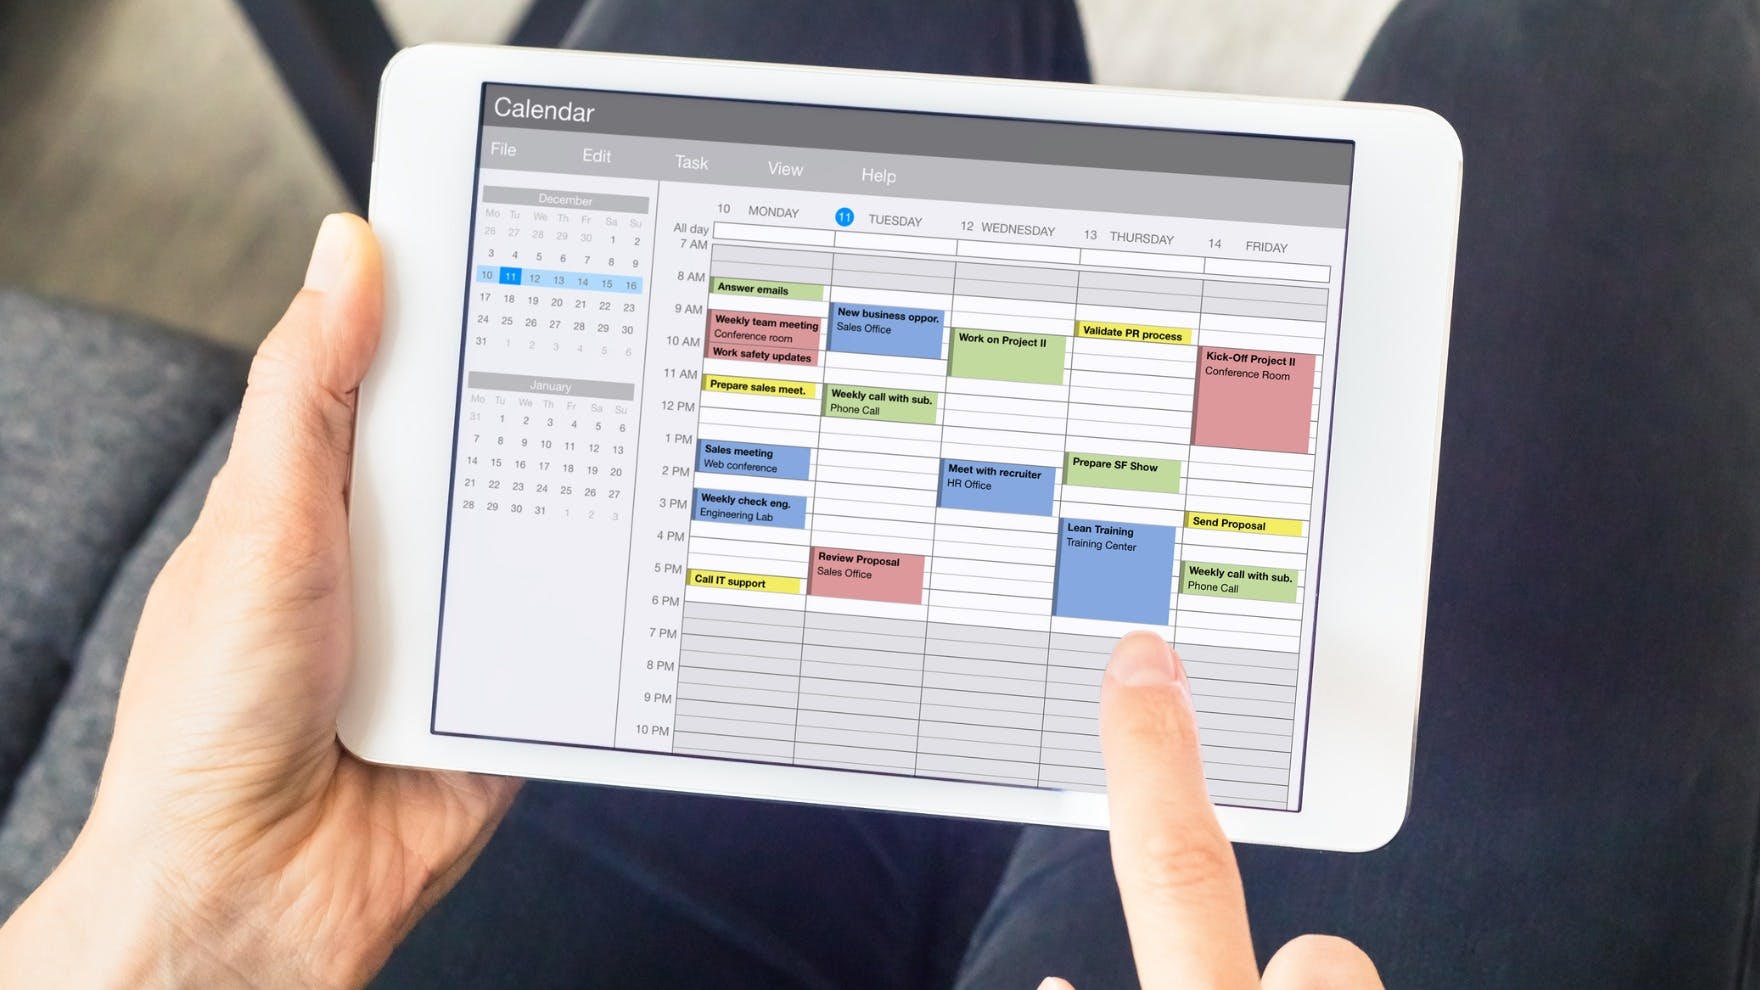
With so much of a sales rep’s day spent connecting with prospects over the phone or in person, it’s important that you understand exactly how to efficiently send a calendar invite in a way that empowers you and your attendees to maximize your meeting time.
The process is actually very simple. But many salespeople don’t use the Calendar Invite to its fullest potential.
Read on to find out all the ways this feature can boost your productivity.
Here’s what we’ll cover:
- When You Should Send an Outlook Calendar Invite
- How to Send a Calendar Invite in Microsoft Outlook
- How to Follow Up After Sending Your Calendar Invite
- Bonus: How Yesware Can Help Your Schedule Meetings Faster
- FAQs
When You Should Send an Outlook Calendar Invite
When it comes to determining the best time to send your meeting invite, there are two factors to consider:
- The right timing to increase the chances of your recipient opening and responding to your meeting request, and
- The appropriate amount of advance notice to provide your invitees
Let’s first look at your best options when it comes to having your calendar invite successfully opened and read.
When to Send an Email for the Best Open Rates
According to 2020 Yesware data, the best time of day to send a calendar event email message is 2:00pm, followed closely by 11:00am.
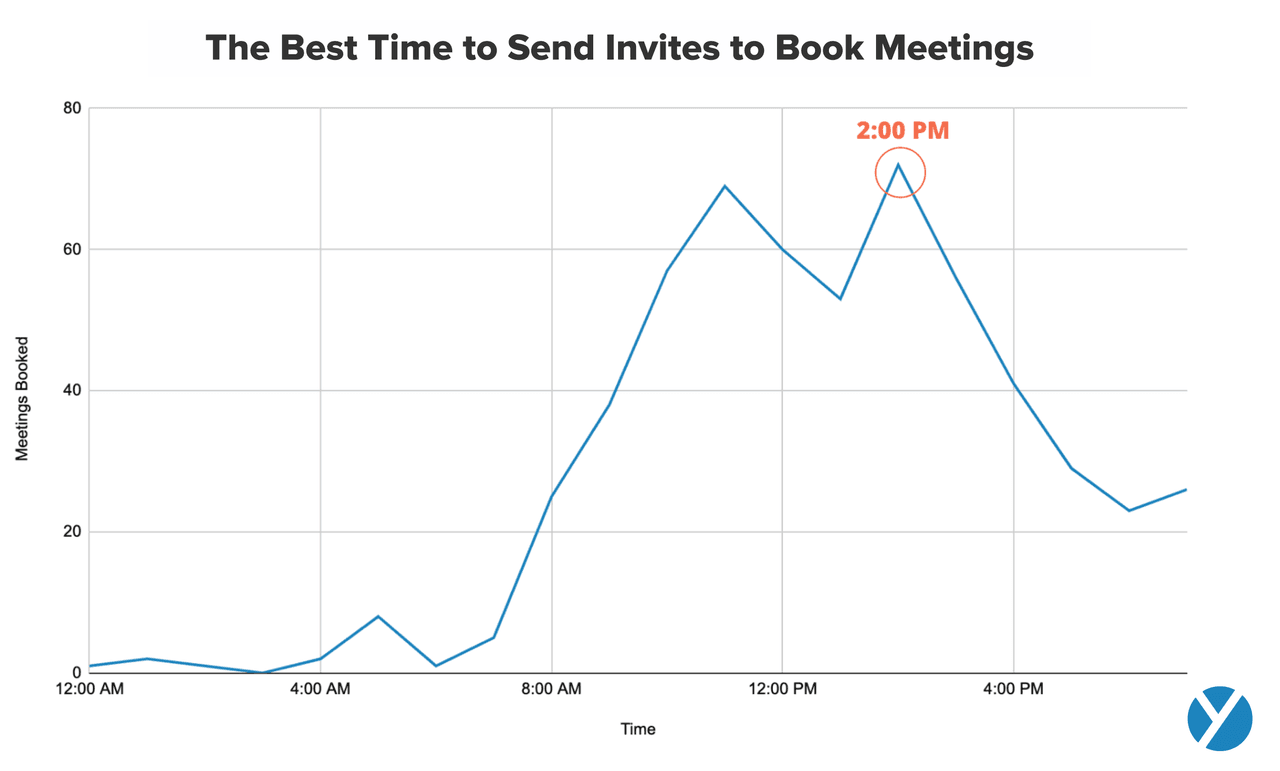
Be mindful of time zones as you use this approach.
And, whatever you do, avoid sending emails very early in the morning. Tools like Yesware’s Send Later feature allow you to write a message and schedule it to send at a specific time later in the day.
The Yesware data showed another timing trend, and it was surprising.
Our analysis involved looking at Meetings Booked vs. Meeting Invites Sent. We called this the Meeting Activity Ration. We then looked at how the Meeting Activity Ratio corresponded to the day of the week.
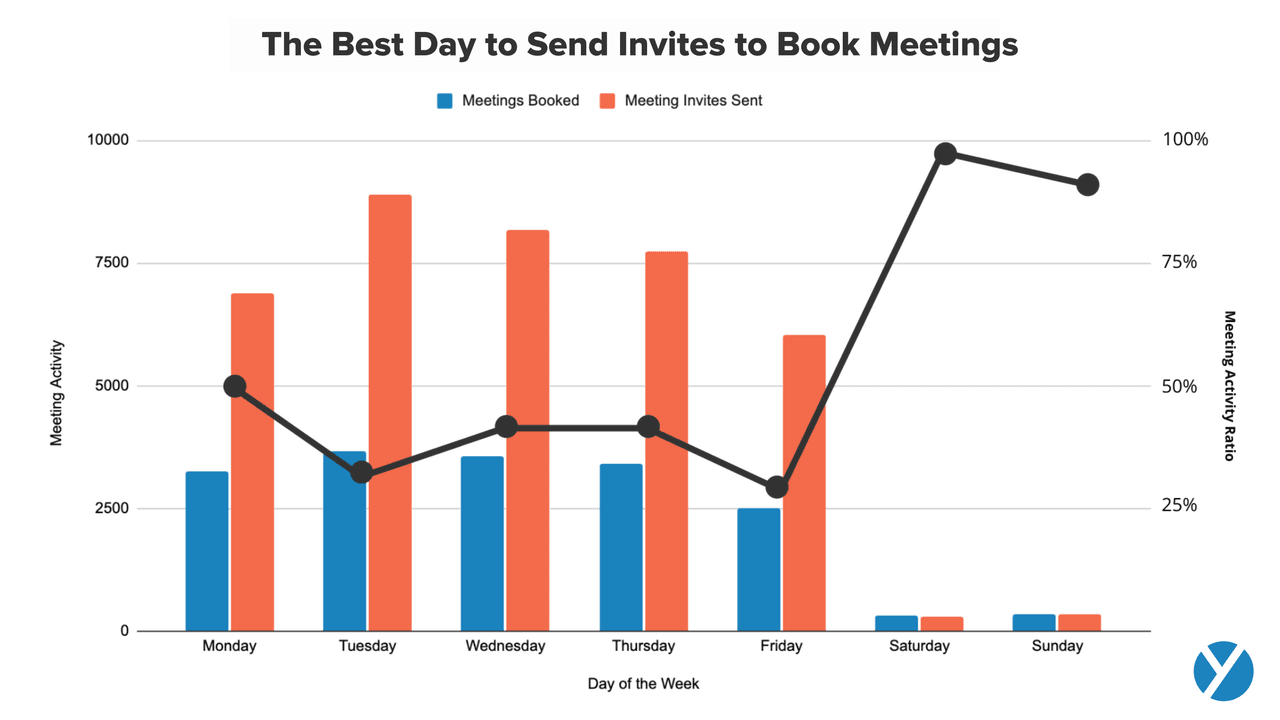
Although the volume of both Meetings Invites Sent and Meetings Booked appears quite low on Saturday and Sunday, the ratio of accepted invites to invites sent is impressive. The data shows a high 90% range of invite attendees added a new event to their calendar if the invite was sent on a Saturday.
If you have a strict no-work-on-the-weekends policy, your best bet is Monday. The thinking here is that people are usually eager to start the week off on a productive note. They’re likely to have fewer things piling up on to their to-do lists earlier in the week.
How to Send a Calendar Invite in Microsoft Outlook
The following steps will guide you through the process of sending a calendar invite in Microsoft Outlook.
{Step 1} Click the Calendar icon.
You can find this in the bottom left corner of your Outlook inbox. After you click the icon, your calendar will pop up.
Depending on your device and the version of Outlook you use, you may instead find the Calendar icon near the New Items drop-down menu on the upper left of your Outlook inbox.
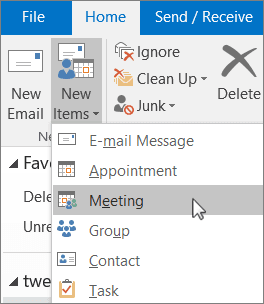
Click New Items and then click Meeting, then skip to Step 3.
{Step 2} Click New Meeting at the top left of your calendar.
Once you click New Meeting, a new meeting window will open. This is the blank invitation for your new event.
{Step 3} Fill in your event details.
There are a few key steps in this process if you want to get the most out of your calendar invite — it starts with inputting your meeting details correctly and completely.
Start by giving your meeting a Title. This should describe the purpose of your meeting and will appear in the subject line of your email message.
{Step 4} Click Required to add attendees.
Find the Required field, and click into it.
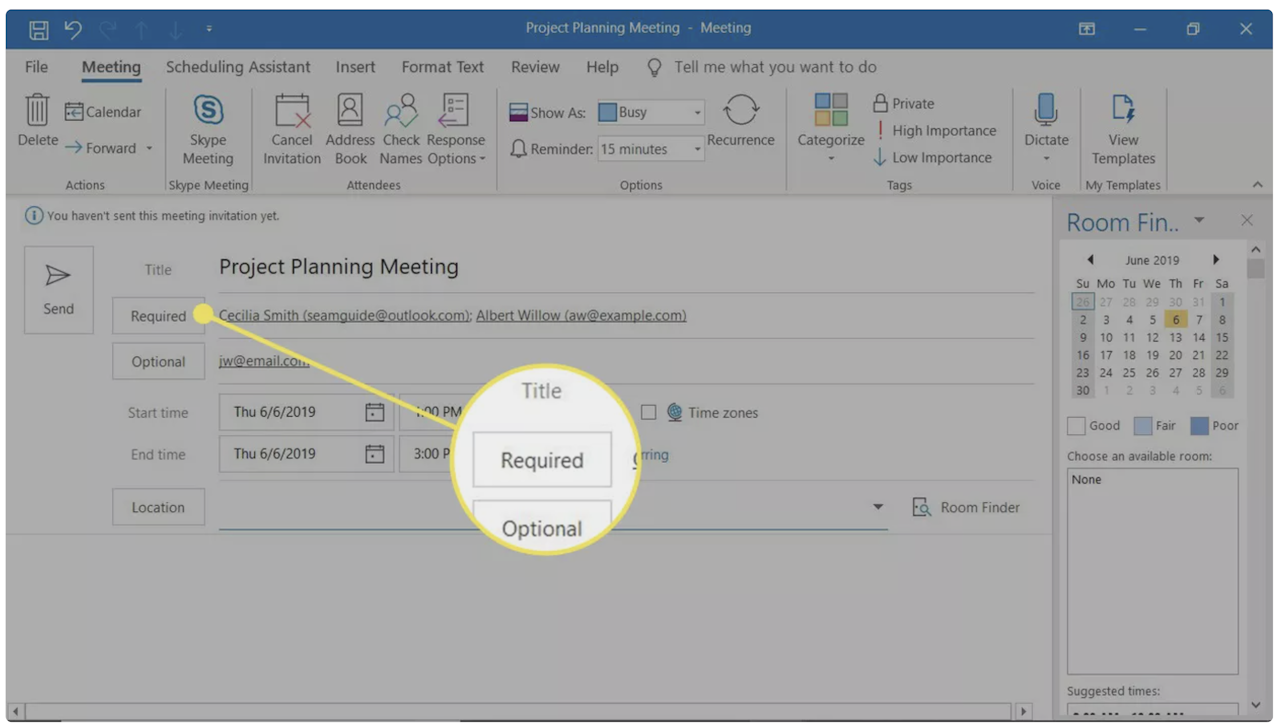
After you click the Required field, Microsoft Outlook will offer you a list of some of your recent email contacts. Select the email addresses of any contacts you’d like to invite.
If you don’t see the contacts you’re looking for, click directly on the Required button (not the fillable field).
Clicking Required will prompt Outlook to open a new dialog box with your Address Book.
Click contacts one at a time from your address book, and then click Required in the bottom left corner for each one. Continue this process until you’ve added all of the required attendees.
You can also give people an “Optional” status by following the same process, but clicking Optional instead of Required.
Note: If you use Microsoft 365 or Exchange, the Scheduling Assistant can help with this process.
{Step 5} When you finish adding attendees, click OK.
You can find the OK button at the bottom right of the Address Book window.
{Step 6} Add Start and End times for your meeting.
Click on the Calendar icon next to the Start Time field. Select the appropriate date and time for the beginning and end of your meeting.
Here is where you can designate whether this event will be a recurring meeting. You can also mark the check box for an all-day event.
{Step 7} Add a location for your meeting.
Click Location and choose a room from the Select Room window. Click OK.
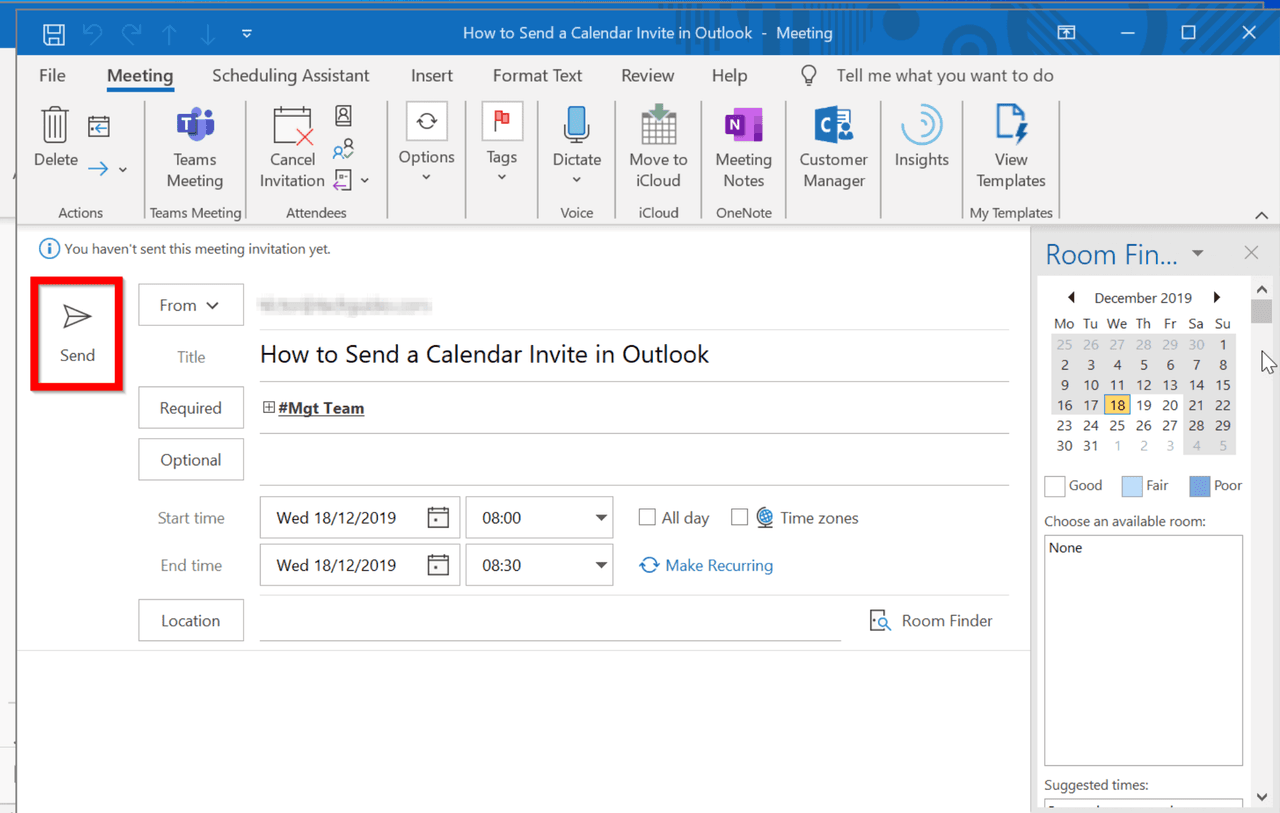
{Step 8} Send to your attendees.
Once you’ve filled in all of the required fields, you can send the meeting invite by clicking Send near the top left of the window.
How to Follow Up After Sending Your Calendar Invite
In an ideal world, all of your invite attendees would respond immediately with one of the standard response options: Yes, No, or Maybe.
Unfortunately, things don’t always pan out that way.
The average person gets well over 80 emails in a day. It’s no wonder some get lost in the shuffle (accidentally or otherwise)!

It’s acceptable and even prudent to send a follow-up email if, after about 24 hours, you still haven’t received a response.
This is another reason why it’s best practice to give about a week’s notice before a meeting — this leaves plenty of time to circle back and straighten out scheduling issues if need be.
Here are some follow-up best practices to keep in mind:
- Spell It Out: Okay, this tip actually needs to be used before the follow-up, but it’s still worth mentioning: try stating directly in your subject line that you’re looking for an RSVP. Subject lines with “RSVP” or “Response Required” are more likely to get opened and read with careful attention.
- Wait 24 Hours: It can be hard to wait, but give your invitees at least a day to consider their attendance or rearrange their calendars. Don’t start following up until at least a full business day has passed following your invite.
- Give a Reminder: It’s also best practice to send a follow-up to those who RSVP that they’ll attend. About 24 hours before your event, send a reminder email to your attendees reminding them of the details of your meeting.
The “thank you for attending” follow-up is also a nice touch, and will show your teammates or your prospects that you appreciate their time.
Bonus: How Yesware Can Help Your Schedule Meetings Faster
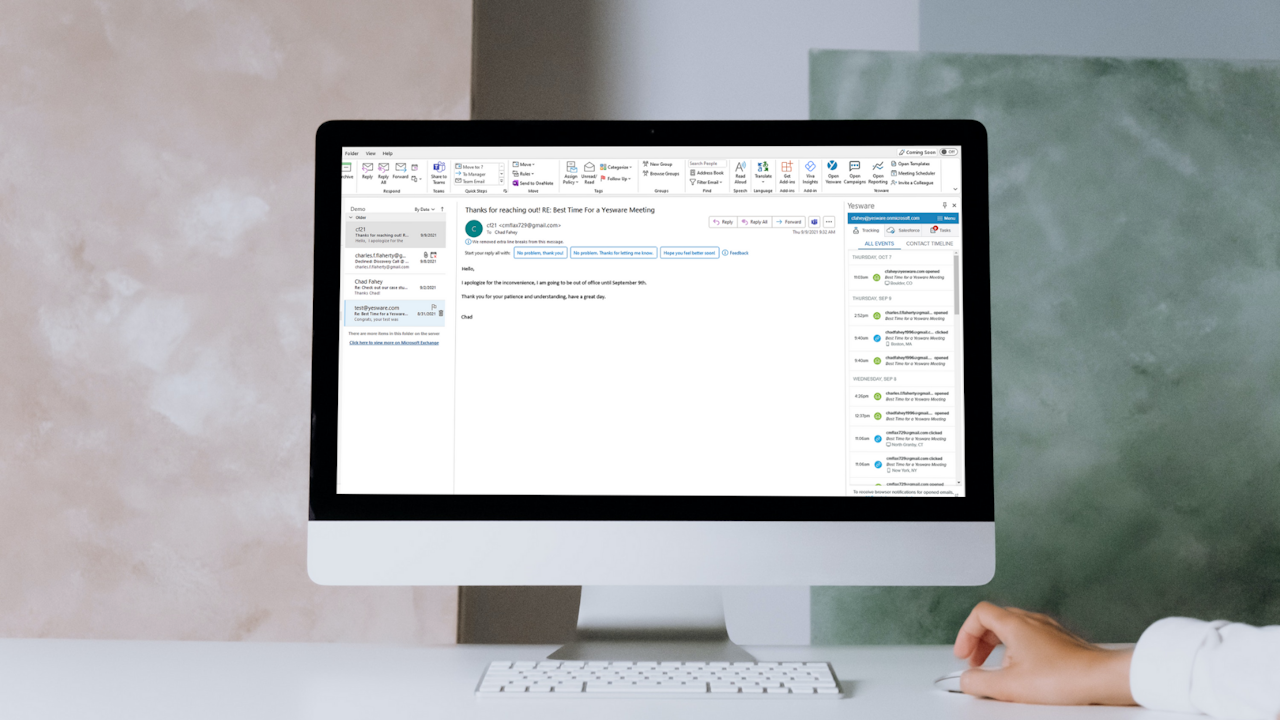
Eliminate the back-and-forth when scheduling meetings in Outlook.
Yesware’s email management features can help sales reps save time and effort when scheduling new appointments and sending follow-ups.
Meeting Scheduler automatically syncs with your Outlook Calendar in real-time.
First, send your customized meeting link. Yesware allows you to create and send a different link for each meeting type.
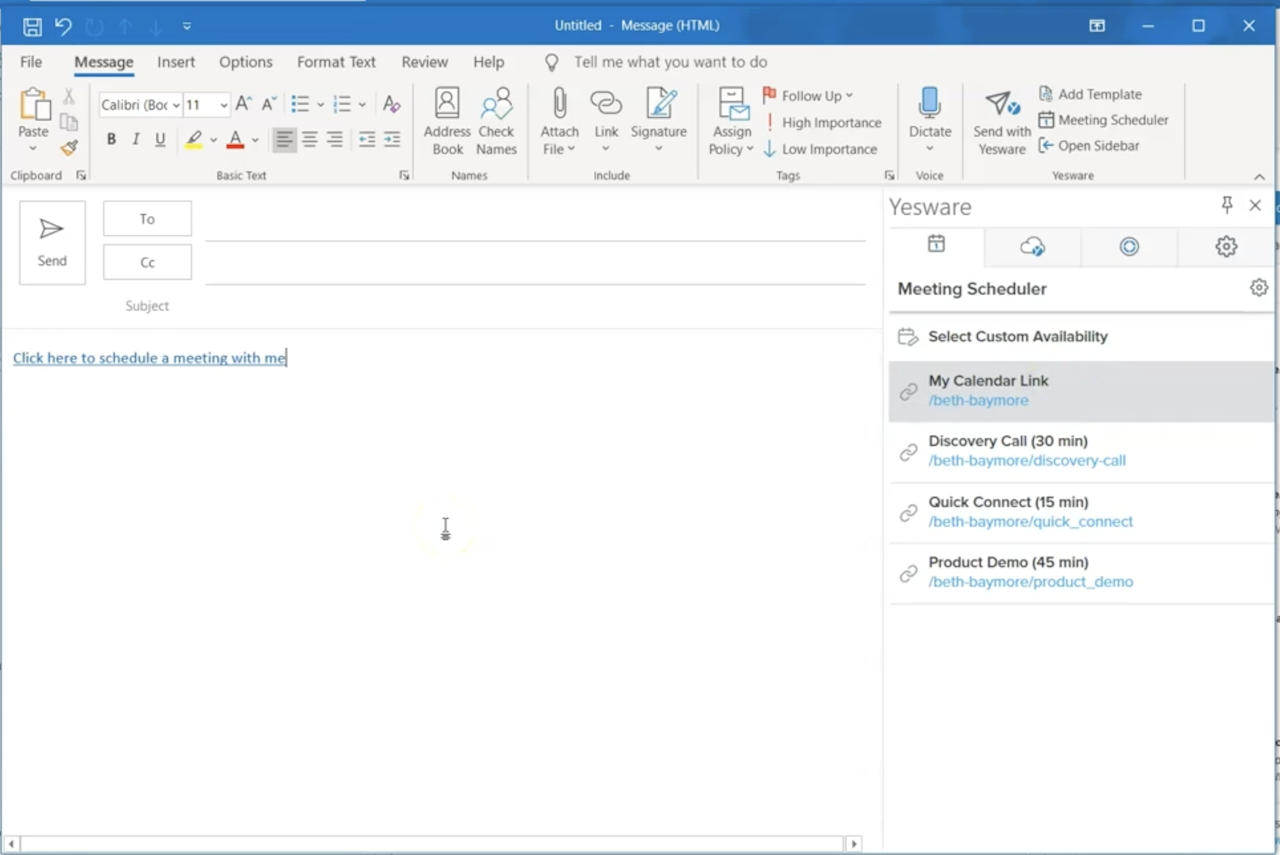
When your recipient clicks on your calendar link, Meeting Scheduler shows them all your available times so that they can choose a time that works best for everyone.
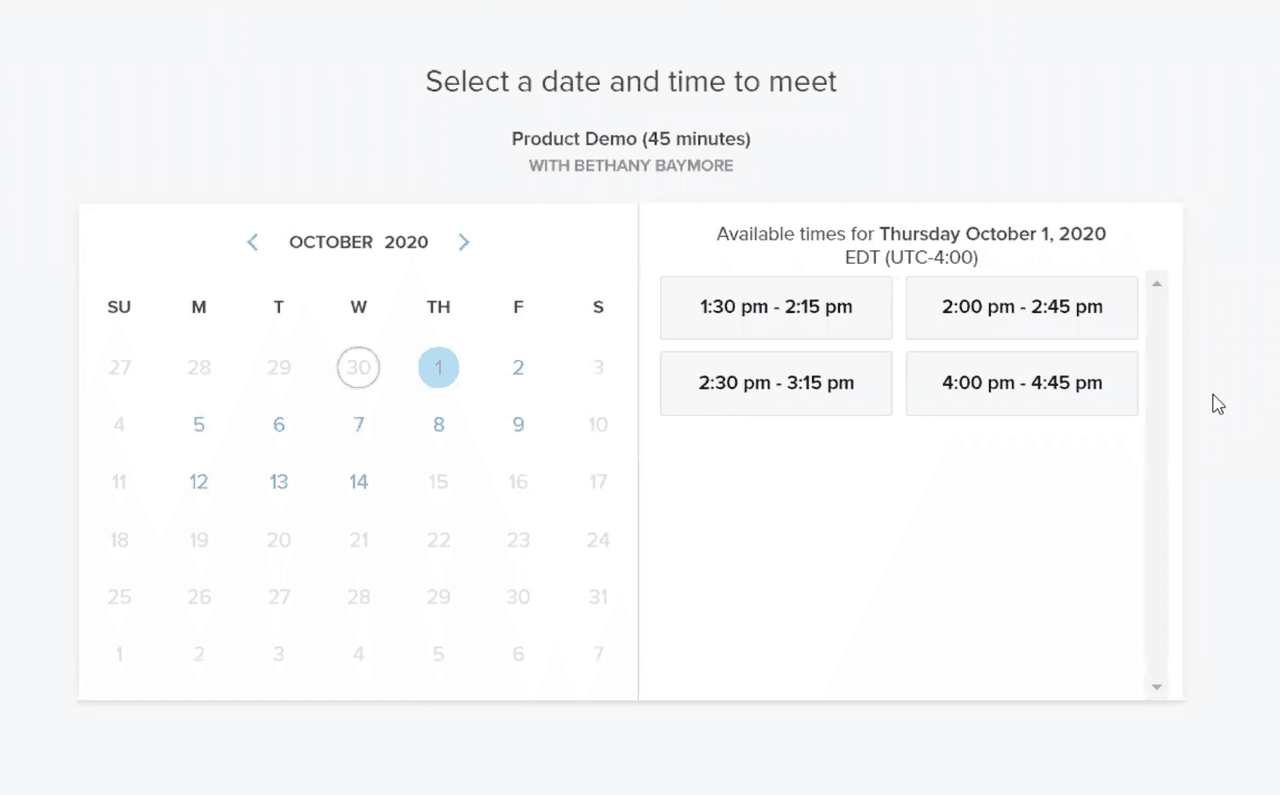
Once your recipient chooses a time, you’ll get an email confirmation and the calendar event will auto-populate right on your calendar too.
It’s that simple.
Yesware also allows users to create a nearly limitless number of email templates that can be written, tested, and saved to use over and over again.
You can use this feature for setting up initial meetings.
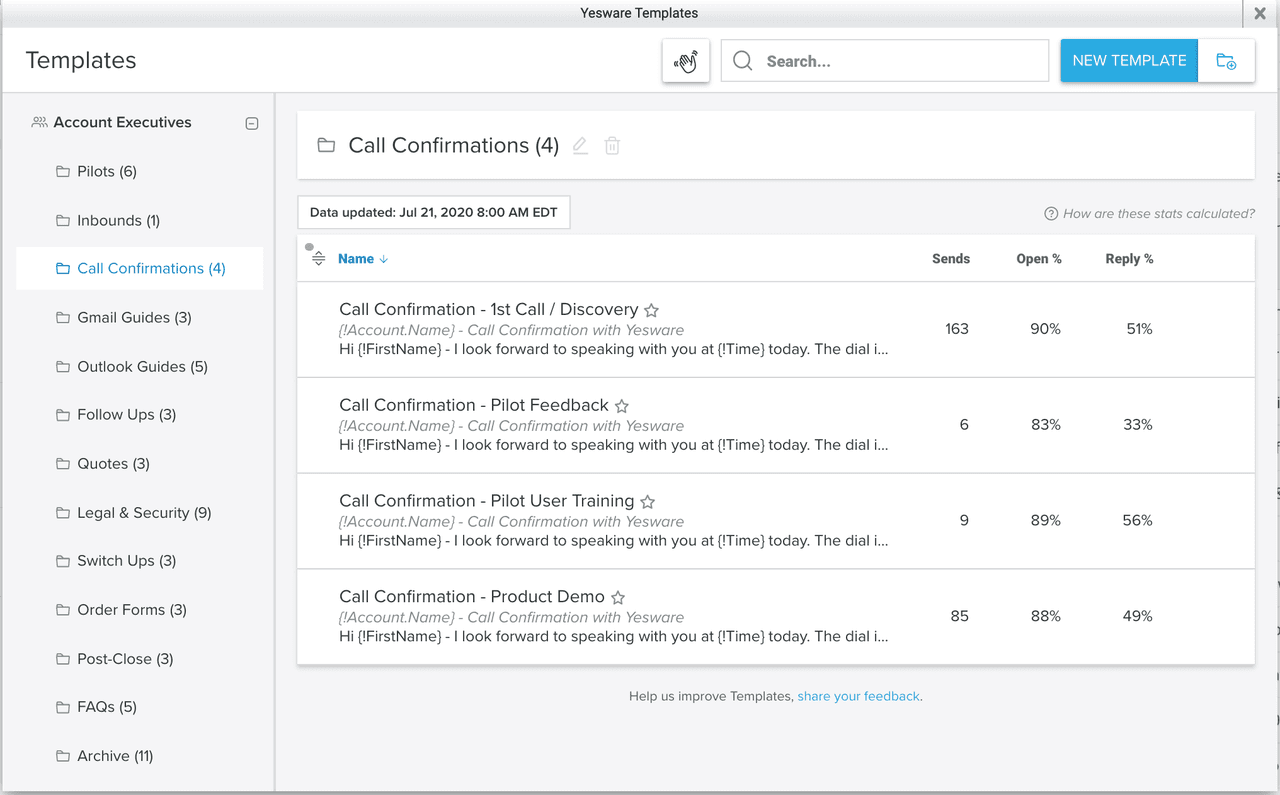
It also comes in handy in managing your follow-up attempts.
Get auto-reminders in your inbox when it’s time to follow up or set up automatic follow-up emails.
Try Yesware for free today to start booking more meetings.
Outlook Calendar Invite FAQs
1. What is an Outlook Calendar invite?
An Outlook Calendar invite is a digital meeting request sent through Microsoft Outlook. It includes event details such as date, time, location, and attendees, and lets recipients accept, decline, or suggest a new time.
2. How does a calendar invite in Outlook work?
A calendar invite in Outlook syncs directly with attendees’ calendars. When someone accepts, the meeting is automatically added. Any changes or cancellations are updated across all participants, keeping everyone aligned.
3. Why should I use an Outlook Calendar invite instead of email alone?
Outlook Calendar invites remove confusion by including clear details like date, time, and RSVP options. This ensures attendees confirm and block their schedule, making it more effective than sending an unstructured email request.
4. Can I customize a calendar invite in Outlook?
Yes. A calendar invite in Outlook allows you to add meeting titles, notes, agendas, files, and video links. Customization helps prepare participants in advance and improves the productivity of the meeting itself.
5. What’s the best time to send an Outlook Calendar invite?
Yesware data shows that mid-morning (around 11 a.m.) and early afternoon (around 2 p.m.) are the most effective times. These time slots increase open and RSVP rates compared to very early or late hours.
6. Can I send recurring meetings with Outlook Calendar invites?
Yes. When creating an invite, you can set recurring meetings daily, weekly, or at a custom interval. This is especially useful for team syncs, client check-ins, or any standing appointments.
7. Do Outlook Calendar invites sync with Google Calendar?
Yes. If recipients use Google Calendar, they’ll still receive the Outlook invite and can accept it. For seamless two-way syncing, tools like Yesware help ensure availability is accurate across platforms.
8. How does Yesware improve Outlook Calendar invites?
Yesware’s Meeting Scheduler integrates directly with Outlook. It generates personalized scheduling links so prospects choose the best time for them. The system then auto-creates and sends Outlook Calendar invites without manual work.
9. How do I follow up after sending a calendar invite in Outlook?
If someone hasn’t responded within 24 hours, send a follow-up email. Yesware automates this process by reminding you or sending scheduled follow-ups at scale, ensuring you confirm attendance and reduce no-shows.
10. Can I track responses to an Outlook Calendar invite?
Yes. Outlook displays who accepted, declined, or hasn’t replied. For added efficiency, Yesware provides engagement insights and reminders so you can act quickly when an invite goes unanswered.
11. What happens if someone proposes a new time in Outlook?
Recipients can suggest alternate times directly through the invite. Outlook alerts you of the proposal, and you can accept, decline, or counter. This feature reduces back-and-forth while keeping scheduling flexible.
12. Are Outlook Calendar invites secure?
Yes. Outlook encrypts communication and only shares event details you include. With organizational controls, you can manage access, ensuring calendar data stays secure for both internal and external participants.
13. How can Outlook Calendar invites help sales teams be more productive?
Outlook Calendar invites streamline scheduling and reduce wasted time. Combined with Yesware’s Meeting Scheduler, sales teams can eliminate back-and-forth, automate reminders, and ensure every meeting is confirmed and added to calendars.
Get sales tips and strategies delivered straight to your inbox.
Yesware will help you generate more sales right from your inbox. Try our Outlook add-on or Gmail Chrome extension for free, forever!
Related Articles


Jenny Keohane

Jenny Keohane

Jenny Keohane
Sales, deal management, and communication tips for your inbox